In a nutshell
- 🕒 Use the three-minute method: dust thoroughly, apply a pea-sized drop of olive oil to a cloth, wipe with the grain, then buff dry for a clean satin glow.
- ✨ Why it works: olive oil softens micro-scratches and evens light reflection, enriching grain and colour; it conditions appearance, not a curing finish.
- 🧪 Choose smartly: pick light olive oil for milder scent; try a 2:1 oil:vinegar mix for grime; adapt to the finish (varnished, waxed, oiled) and avoid laminate or unfinished wood.
- ⚠️ Know the limits: skip antiques or degraded finishes, prevent build-up with minimal application, and rebuff if any oily feel or scent lingers.
- 🌿 Quick, frugal, eco-friendly: this kitchen-cupboard hack delivers instant sheen without harsh chemicals—just remember to test first and keep it thin.
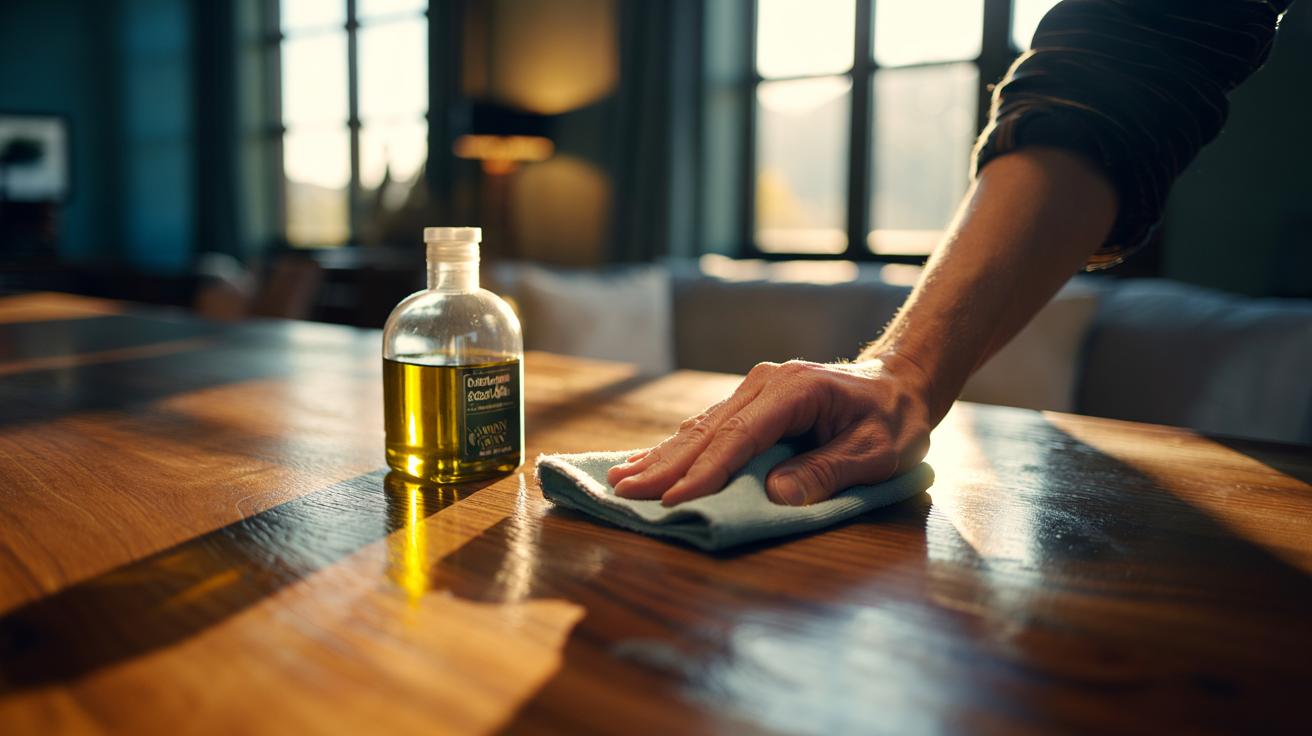
There’s a quick, quiet magic to be found in your kitchen cupboard. Reach for olive oil and you can revive tired wooden surfaces in minutes, not hours. The trick is simple, swift, and surprisingly elegant: a light application restores lustre, softens the look of micro-scratches, and deepens the grain without harsh chemicals. It’s also frugal and kinder to the planet than aerosol sprays. Still, it pays to be precise. Use only a small amount and always test on an inconspicuous spot first. Done right, the result looks professional, smells pleasant, and leaves furniture touch-dry with a satin glow rather than a greasy film.
Why Olive Oil Works on Wood
Wood is porous, even when sealed, and it responds beautifully to a thin replenishment of oil. Olive oil has a viscosity that lets it slip into microscopic scratches and recesses, creating a smoother optical surface that reflects light more evenly. The effect is immediate: grain appears richer, colour looks warmer, and minor scuffs fade back. Unlike drying oils such as tung or linseed, olive oil doesn’t cure; it conditions the appearance rather than forming a hard film. That’s precisely why it’s perfect for a quick, three-minute refresh between deeper treatments.
Scientifically, the oil’s refractive index is close enough to that of wood fibres to soften contrast at the surface. Think of it as a temporary lens that hides the roughness. It won’t fix dents or water rings, but it will make them less assertive. Crucially, a tiny amount goes a long way. Over-application invites dust and smudges, while a whisper-thin coat leaves a clean, dry-feel sheen that makes a table look recently polished, not slick.
The Three-Minute Method: Step by Step
Set a timer. You need a soft, lint-free cloth, a teaspoon of olive oil, and a calm hand. First half-minute: dust thoroughly. Any grit left on the surface turns into abrasive under your cloth. Dusting is non-negotiable. The next minute: place a pea-sized drop of oil on the cloth, not directly on the wood, and fold it to distribute. Work in sections the size of a placemat.
Always move with the grain. Use light, overlapping strokes and keep the cloth moving so you deposit a whisper-thin film. If the cloth starts to drag, add a fraction more oil to the cloth—another pea-sized touch. The third minute is for buffing. Switch to a clean, dry part of the cloth and polish briskly. The goal is shine without residue. Stop buffing only when the surface feels dry to the touch. Stand back. You should see a soft, even glow, improved depth of grain, and fewer visible hairline scuffs, all without that tell-tale smudge of over-polish.
Choosing the Right Oil and Add-Ins
Not all olive oils behave identically on furniture. Light olive oil spreads more easily and leaves less scent; extra virgin offers slightly richer colour but can carry a stronger aroma. For speed, either works, but go light if you’re sensitive to fragrance. For greasy fingertips or rings, a simple add-in can help. Mix two parts olive oil with one part white vinegar or strained lemon juice; the mild acid lifts grime while the oil restores sheen. Apply that blend sparingly and buff well so no moisture lingers on the surface.
Match the approach to the finish. Sealed modern varnishes accept a quick oil-buff gracefully; waxed finishes prefer even less oil and a firmer buff; unfinished wood drinks oil and can darken unexpectedly. The table below summarises best bets for a rapid refresh.
| Surface/Finish | Recommended Mix | Notes |
|---|---|---|
| Sealed varnished wood | Neat olive oil | Apply very thinly; buff dry. |
| Waxed wood | Neat olive oil (tiny amount) | Keep minimal to avoid softening wax. |
| Oiled/penetrating finishes | Neat or 2:1 oil:vinegar | Test; may darken slightly. |
| Unfinished wood | Avoid quick shine | Use a proper drying oil treatment. |
| Laminate/veneer plastics | Avoid | Use a damp cloth and mild soap. |
When to Avoid the Trick and Prevent Problems
There are moments when restraint is the smartest polish. Antique pieces with delicate shellac, museum-grade finishes, or flaking varnish should not meet the kitchen bottle. If the surface feels sticky, cloudy, or smells of old silicone polish, do a gentle clean first. A slightly damp microfibre cloth with a drop of mild washing-up liquid removes residues better than oil can. Once the surface is clean and dry, reassess whether it needs shine or specialist care.
A word on build-up. While olive oil won’t cure, it can attract dust if left thick. Avoid monthly soaking; instead, think of it as a spot treatment for coffee tables before guests arrive or for a dresser ahead of a photo. If you detect an oily scent days later, you used too much—buff again with a clean cloth. And if the wood shows white water marks or deep scratches, step up to a dedicated product or a professional restoration. Quick shine is a finish-friendly refresh, not a miracle repair.
A humble bottle of olive oil can turn a dull table into a quietly gleaming centrepiece in three measured minutes. It’s fast, thrifty, and satisfying, particularly when you master the less-is-more approach and respect the wood’s finish. Keep a soft cloth in the drawer, add a teaspoon to your toolkit, and you’ve got a reliable newsroom-worthy hack this side of miraculous. Test, apply thinly, buff dry—then enjoy the renewed glow. Which beloved wooden surface in your home is first in line for a three-minute revival today, and what finish are you working with?
Did you like it?4.6/5 (25)